Performances
A Performance in Bandmaster represents any event your band is involved in — a live gig, a rehearsal, a recording session, or any other scheduled occasion. Each performance has its own dedicated page where you and your bandmates can coordinate everything you need, from the setlist to availability.
Creating a Performance
You create performances from your Space page (your band's home in Bandmaster).
- Navigate to your Space page.
- Click the "+ Add Performance" button.
- A dialog will appear — fill in the details:
- Title — give the performance a clear name (e.g., "Friday Night Gig at The Venue" or "Tuesday Rehearsal").
- Date & Time — set when the performance starts.
- Venue — optionally enter the location.
- Band — select which band this performance belongs to.
- Status — choose the initial status (usually Draft).
- Click Save to create the performance.
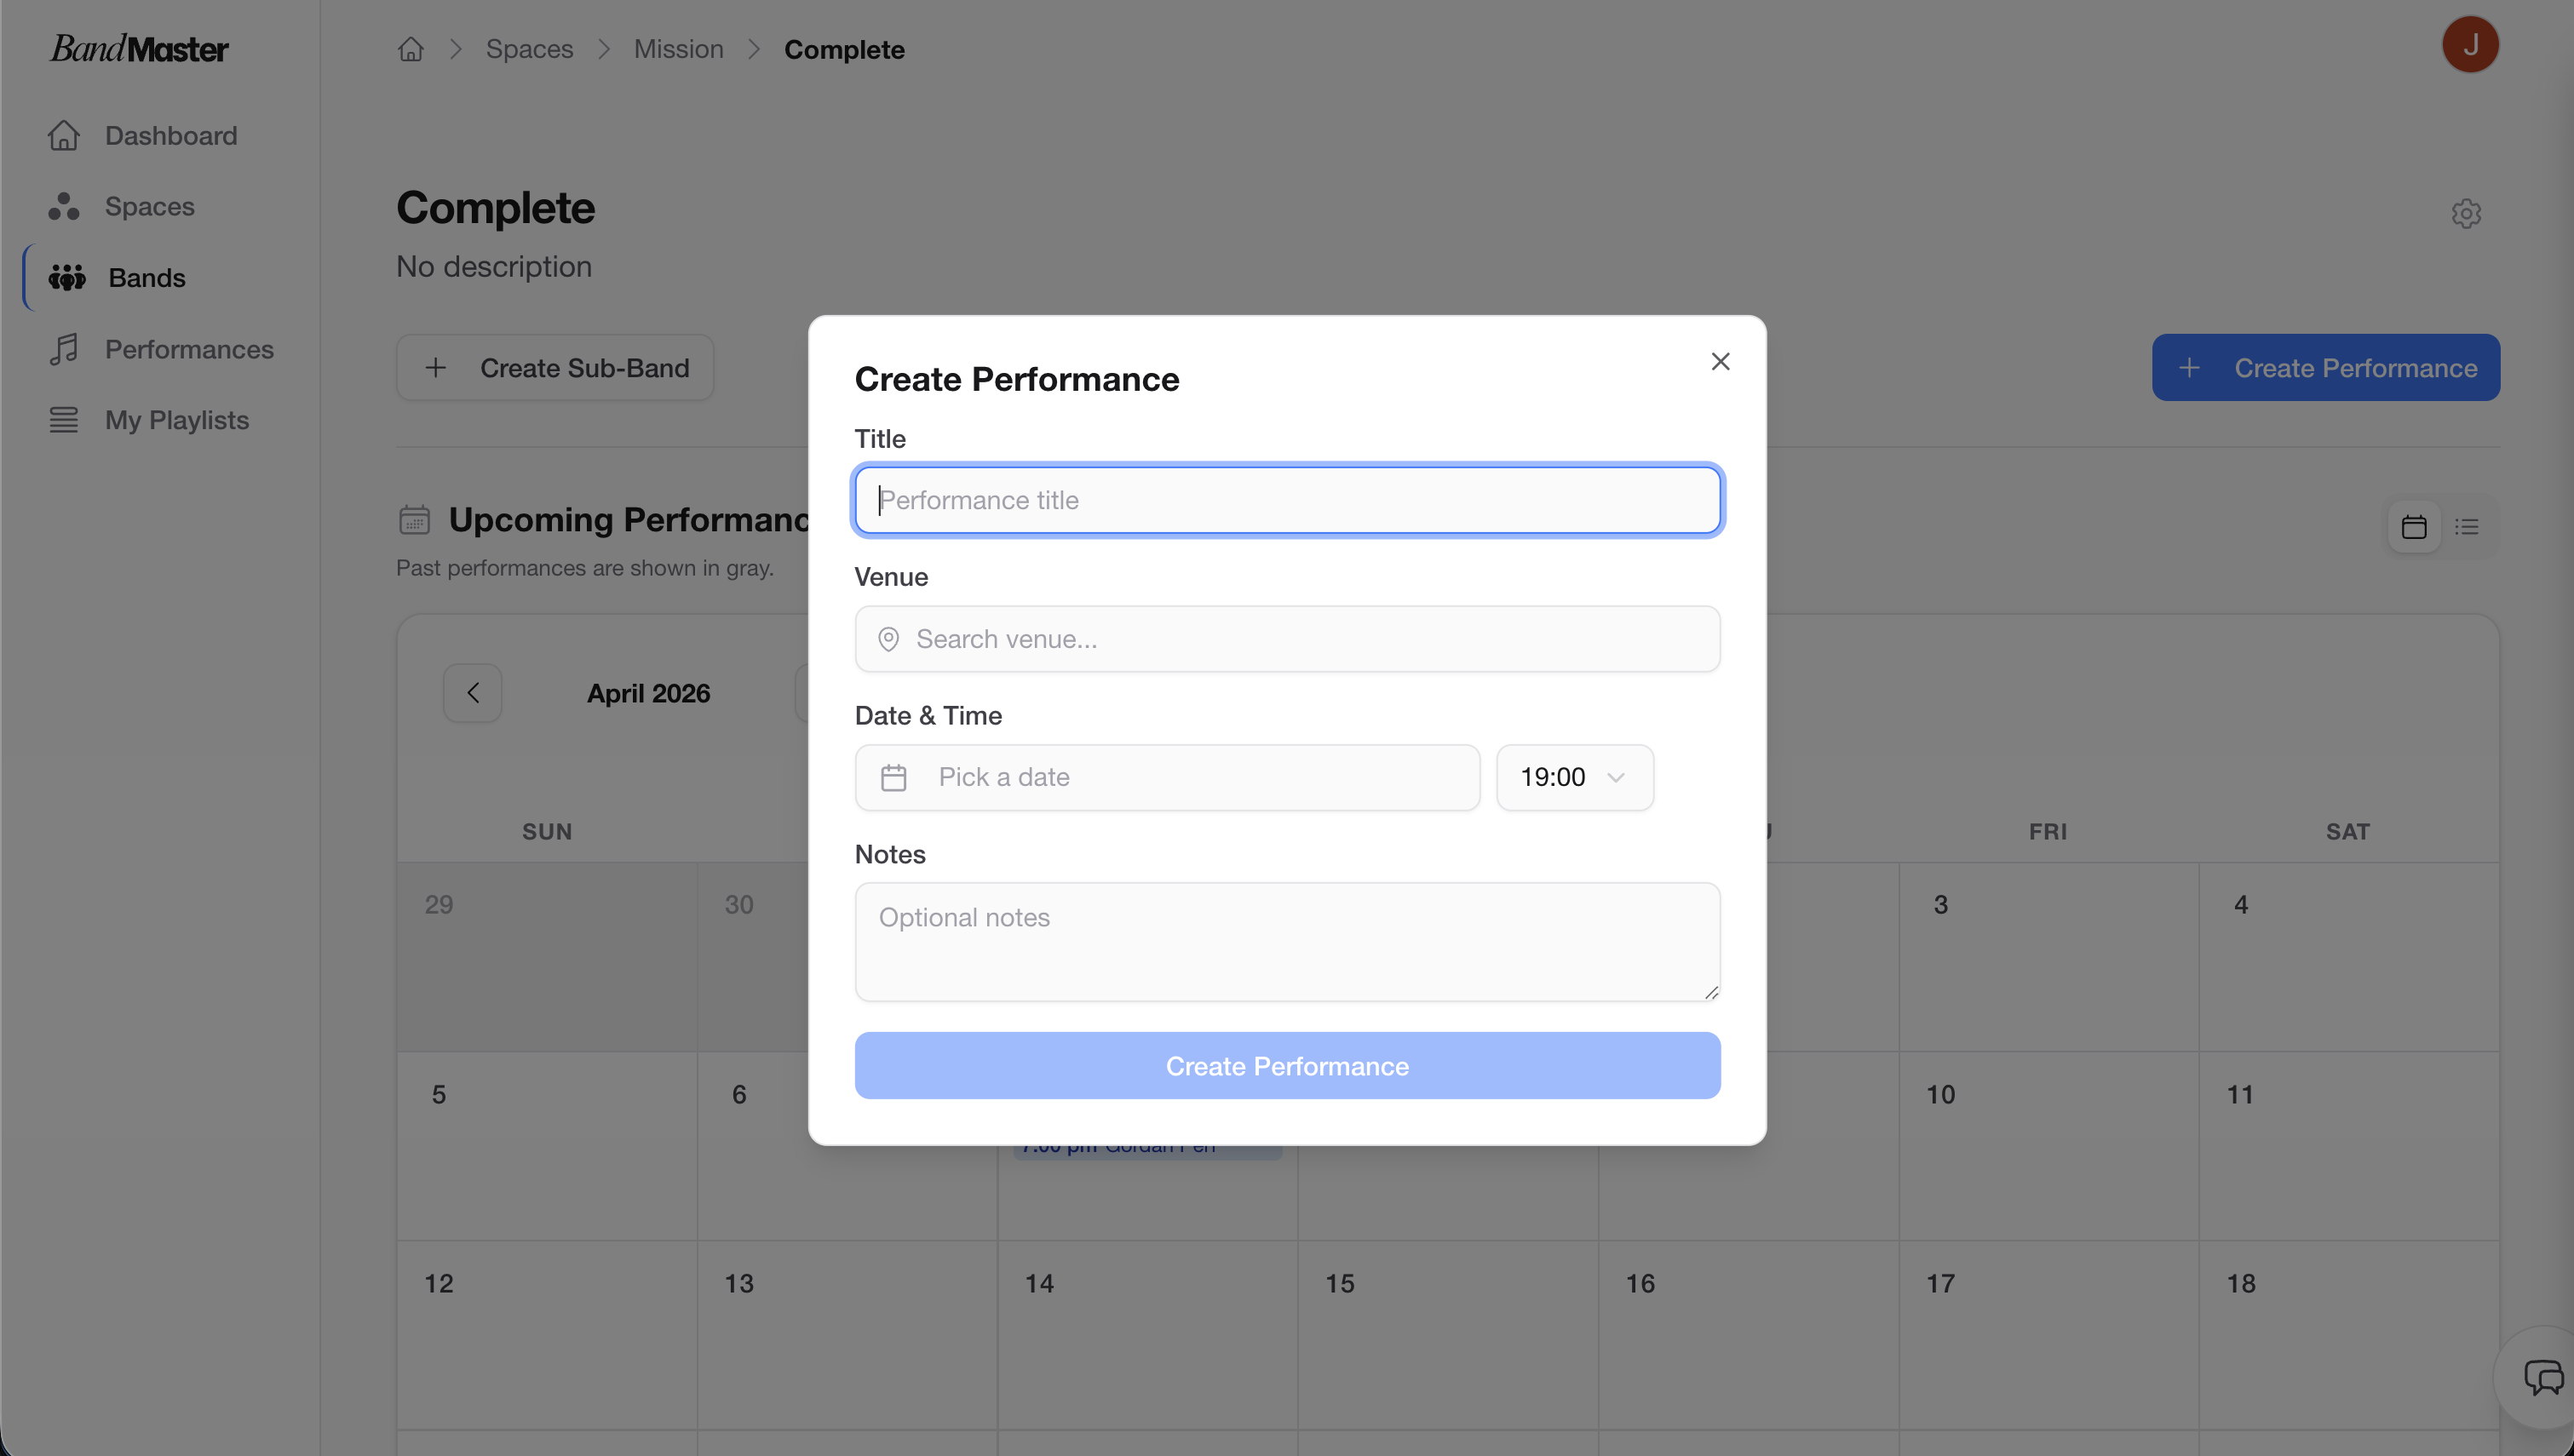 Create performance dialog
Tip: You can also create performances from a recurring schedule, which automatically generates multiple performances at once. See Recurring Events for details.
Performance Page Overview
Once created, opening a performance brings you to the Performance Detail page. This page is divided into up to six sections, each covering a different aspect of the event.
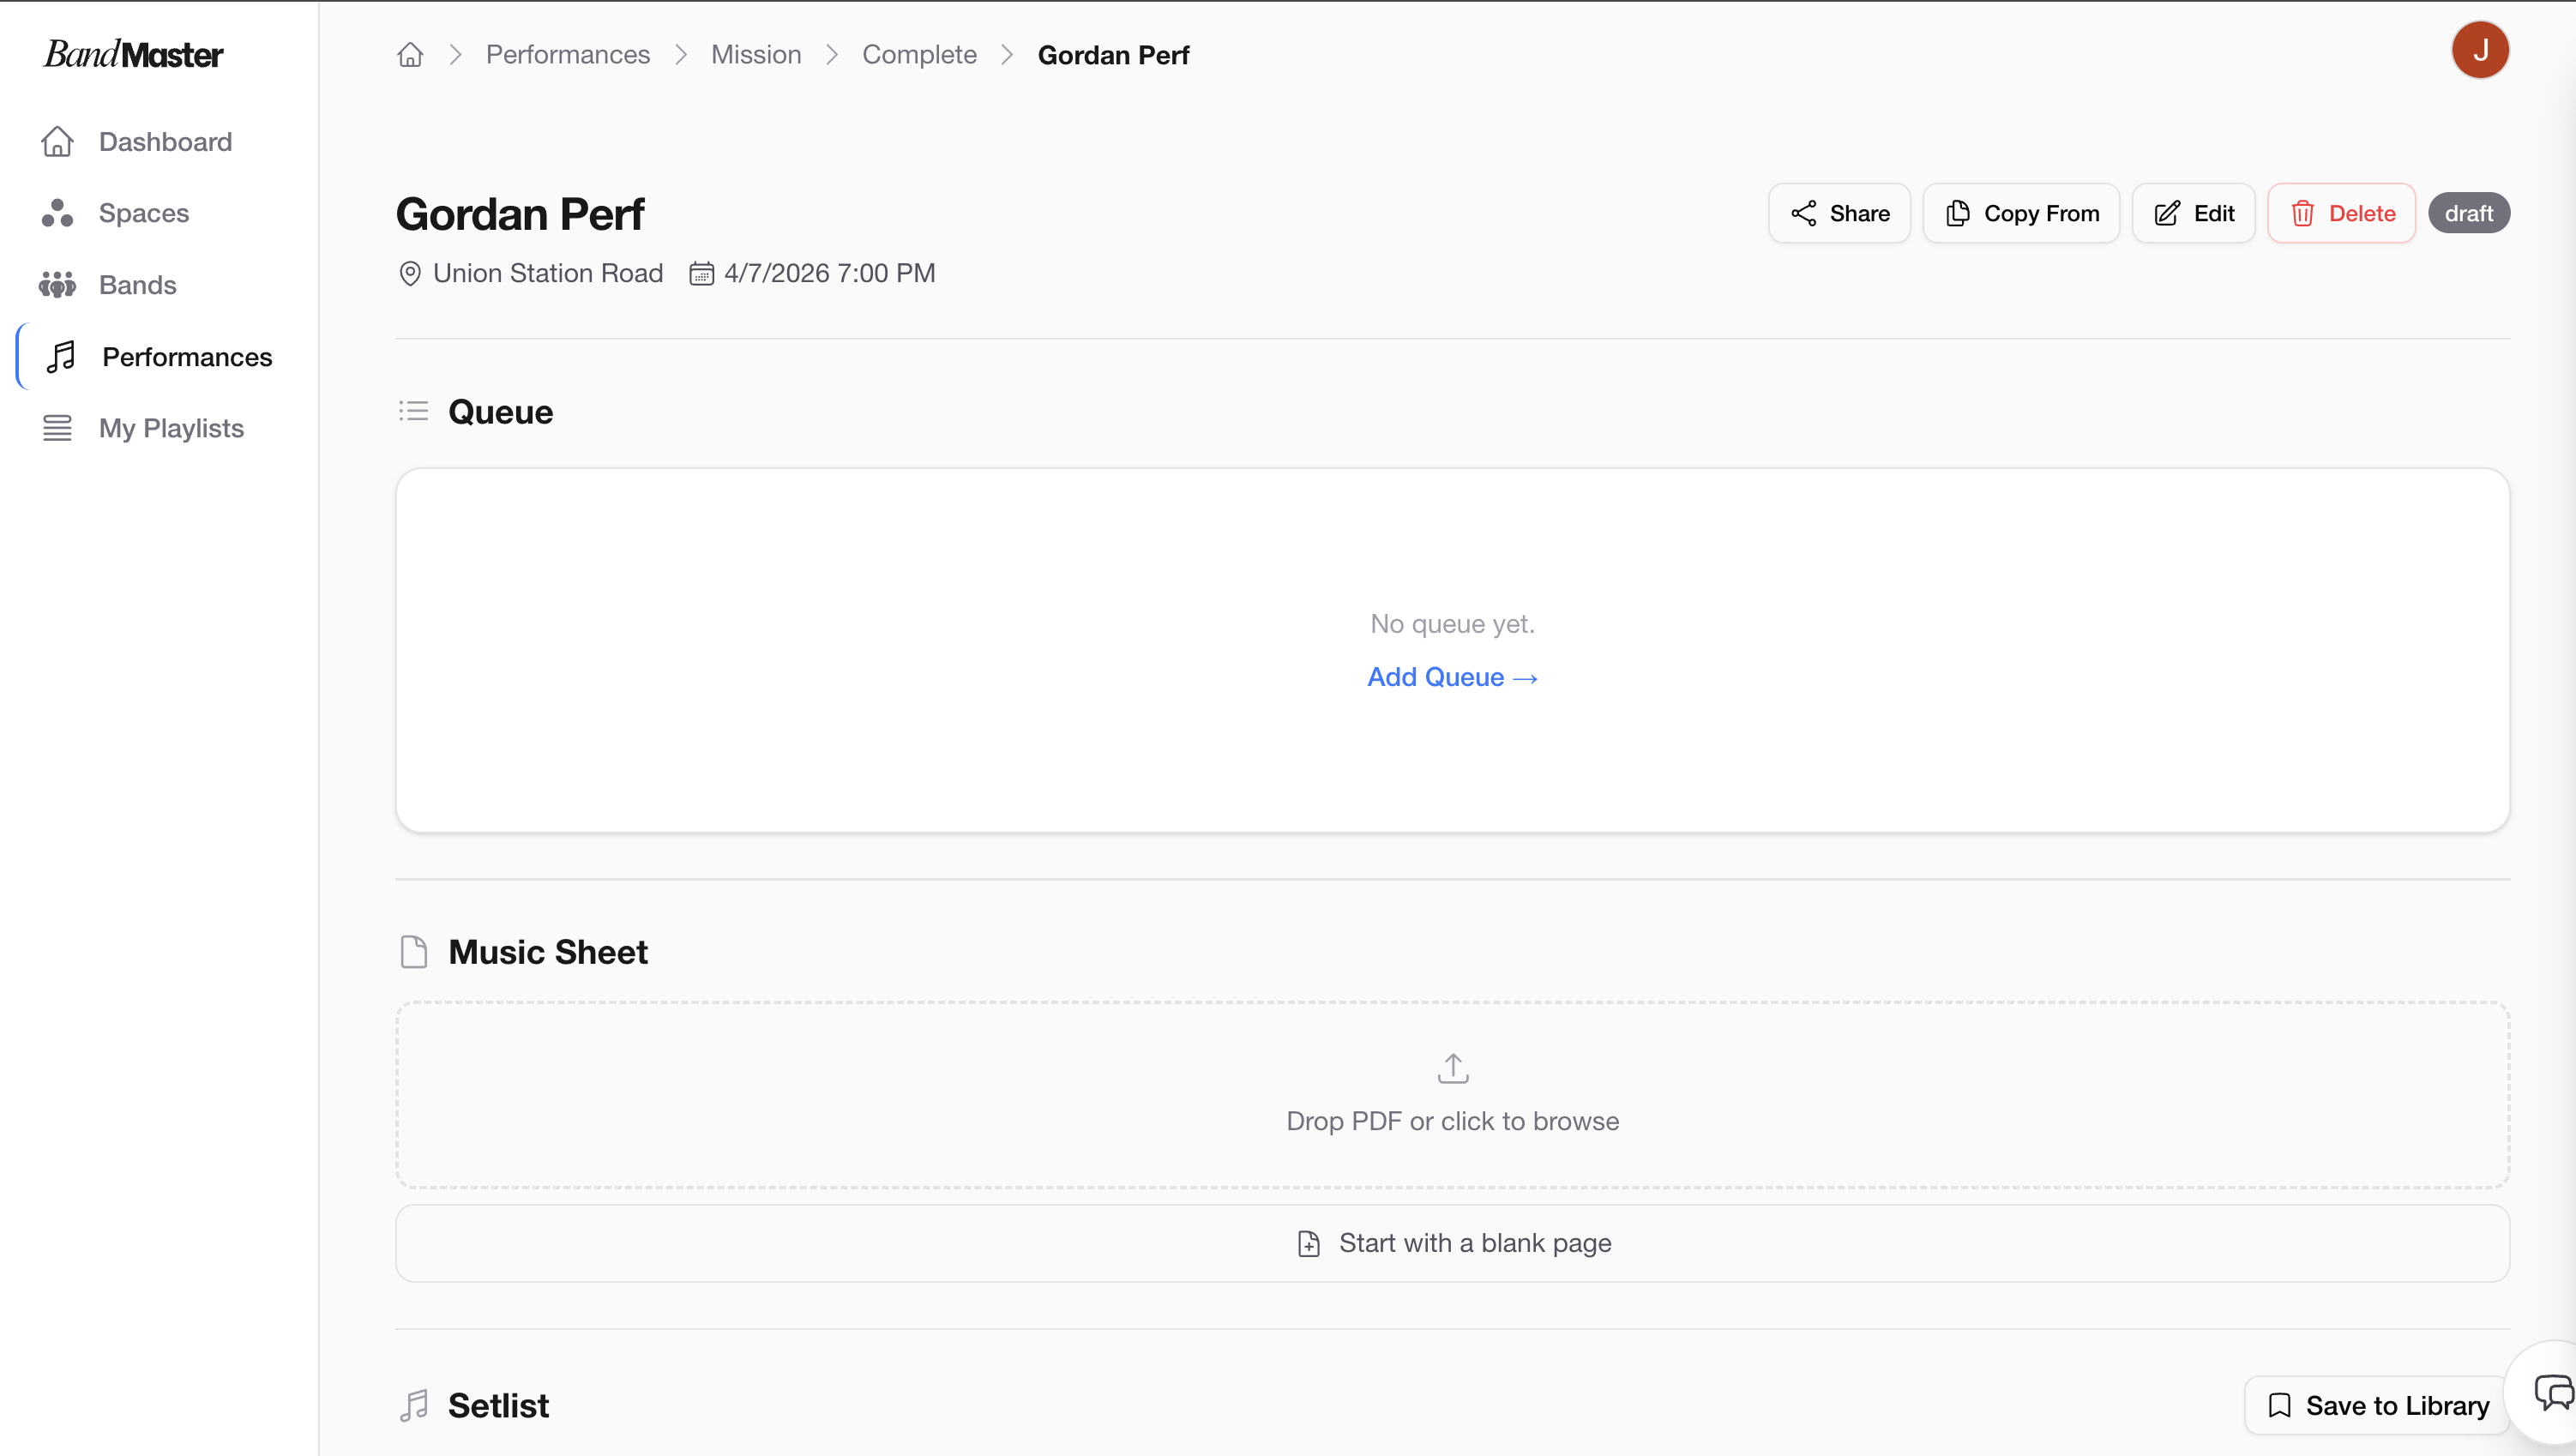 Performance detail page
The Six Sections
| Section | What it's for |
|---|---|
| Queue | Run-of-show items and notes about the performance flow |
| Music Sheet | Attach a PDF score or sheet music for the band |
| Setlist | An ordered list of songs, with audio, stems, lyrics, and chords |
| Availability | Members mark whether they can attend |
| Notes | General free-form notes for the performance |
| Live | Live setlist mode — follow along during the actual performance |
All sections are optional and configurable. You can hide any section you don't need to keep the page focused.
Performance Status
Every performance has a status that reflects where it is in the planning cycle.
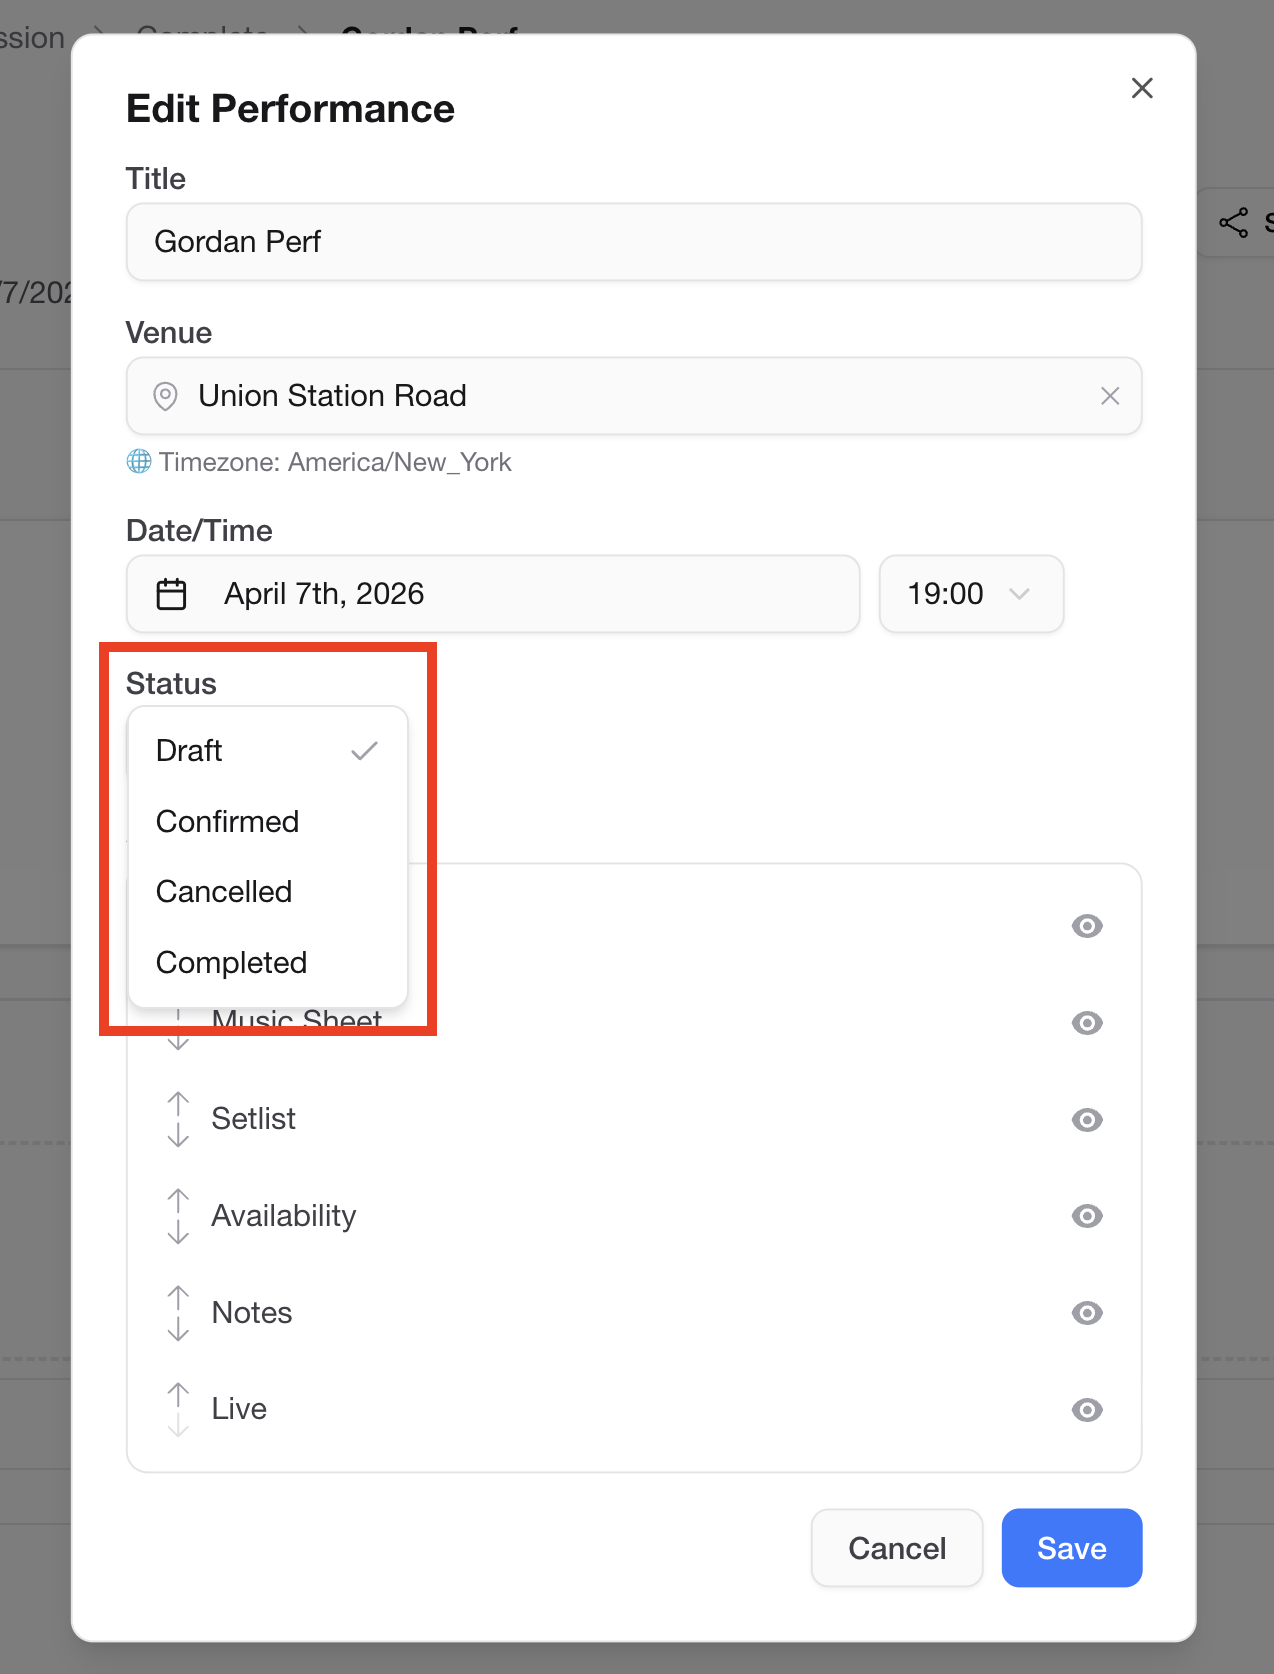 Performance status badge
The status flow is:
Draft → Confirmed → Completed
                 → Cancelled
- Draft — The performance is being planned. Details may still change.
- Confirmed — The performance is locked in and happening.
- Completed — The performance has taken place.
- Cancelled — The performance was called off.
To change the status, click the status badge at the top of the performance page and select a new status from the dropdown.
Tip: Use Draft while you're still sorting out details, then move to Confirmed once the date and setlist are locked in. This helps members know what's finalized.
Configuring Sections
You can control which sections are visible on a performance page. This is useful when, for example, a rehearsal doesn't need a Music Sheet but a live gig does.
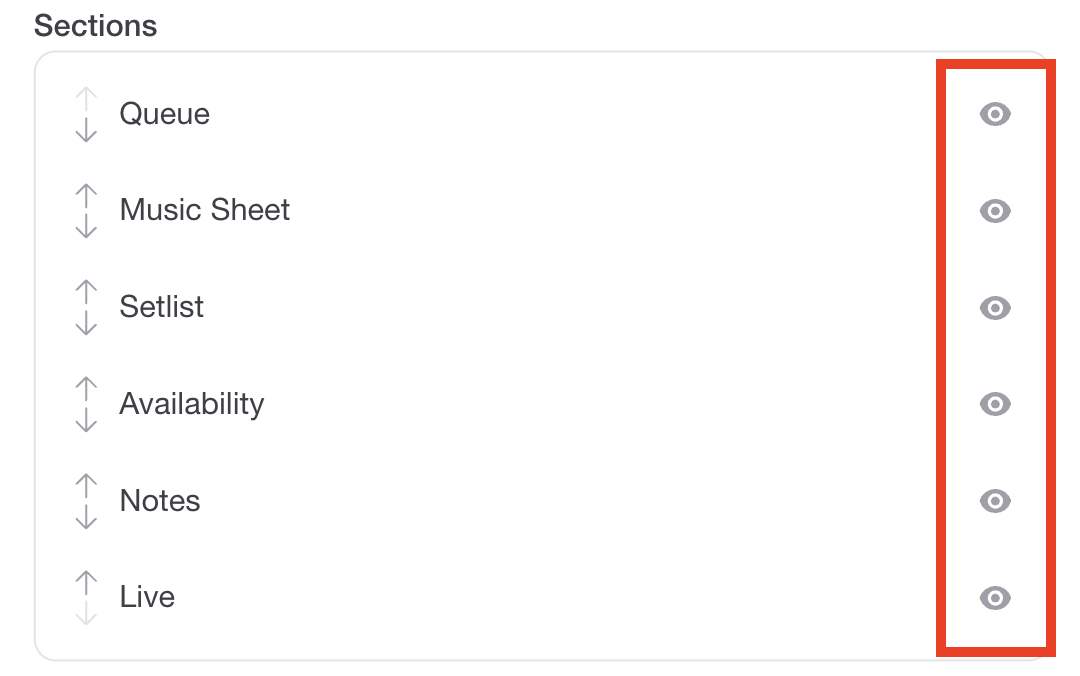 Configurable sections
- On the performance page, open Settings (look for the gear icon or the settings menu).
- Under Section Visibility, toggle each section on or off.
- Changes take effect immediately for all members viewing the page.
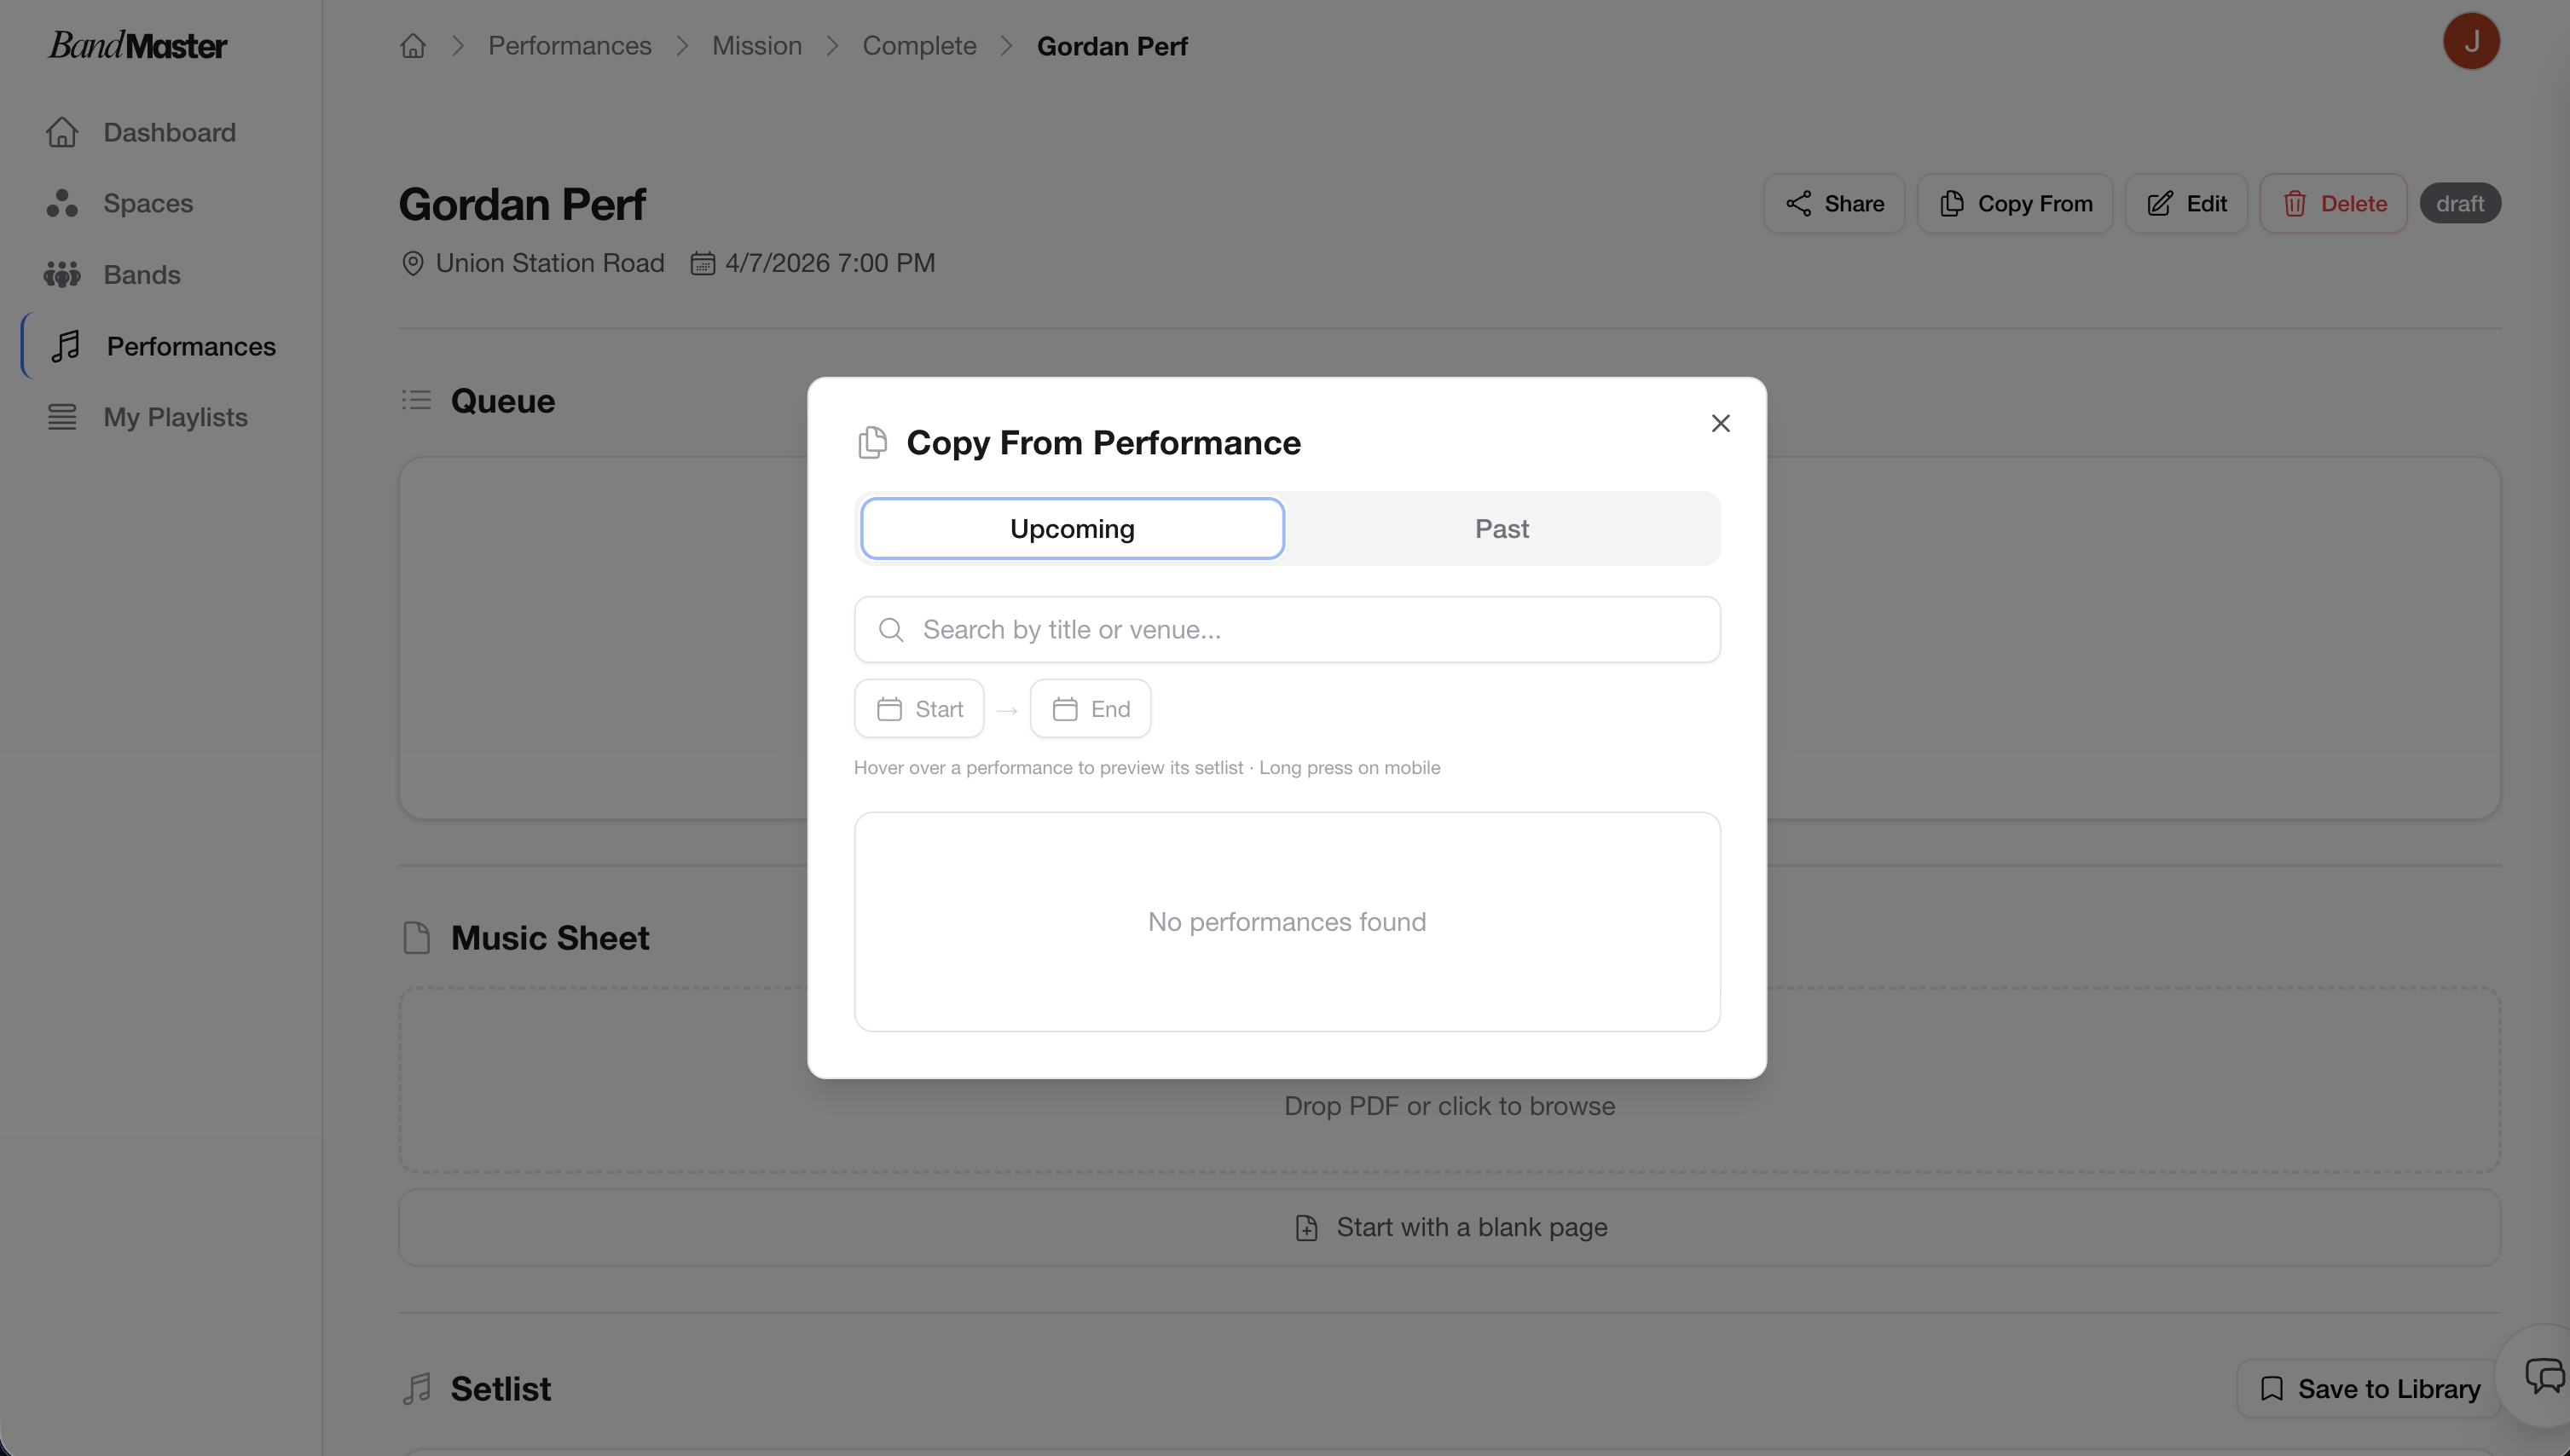
Copying from Another Performance
If you're setting up a performance that's similar to a past one — for example, reusing a setlist from a previous gig — you can copy content over instead of rebuilding it from scratch.
 Copy from another performance dialog
- On the performance page, open the settings menu or look for the "Copy from..." option.
- Select the past performance you want to copy from.
- Choose which sections to copy (e.g., Setlist, Queue, Notes).
- Confirm — the selected content will be imported into the current performance.
Tip: Copying a setlist is a great time-saver for bands that play a consistent repertoire. Bring over the songs from a recent show and then just tweak the order.
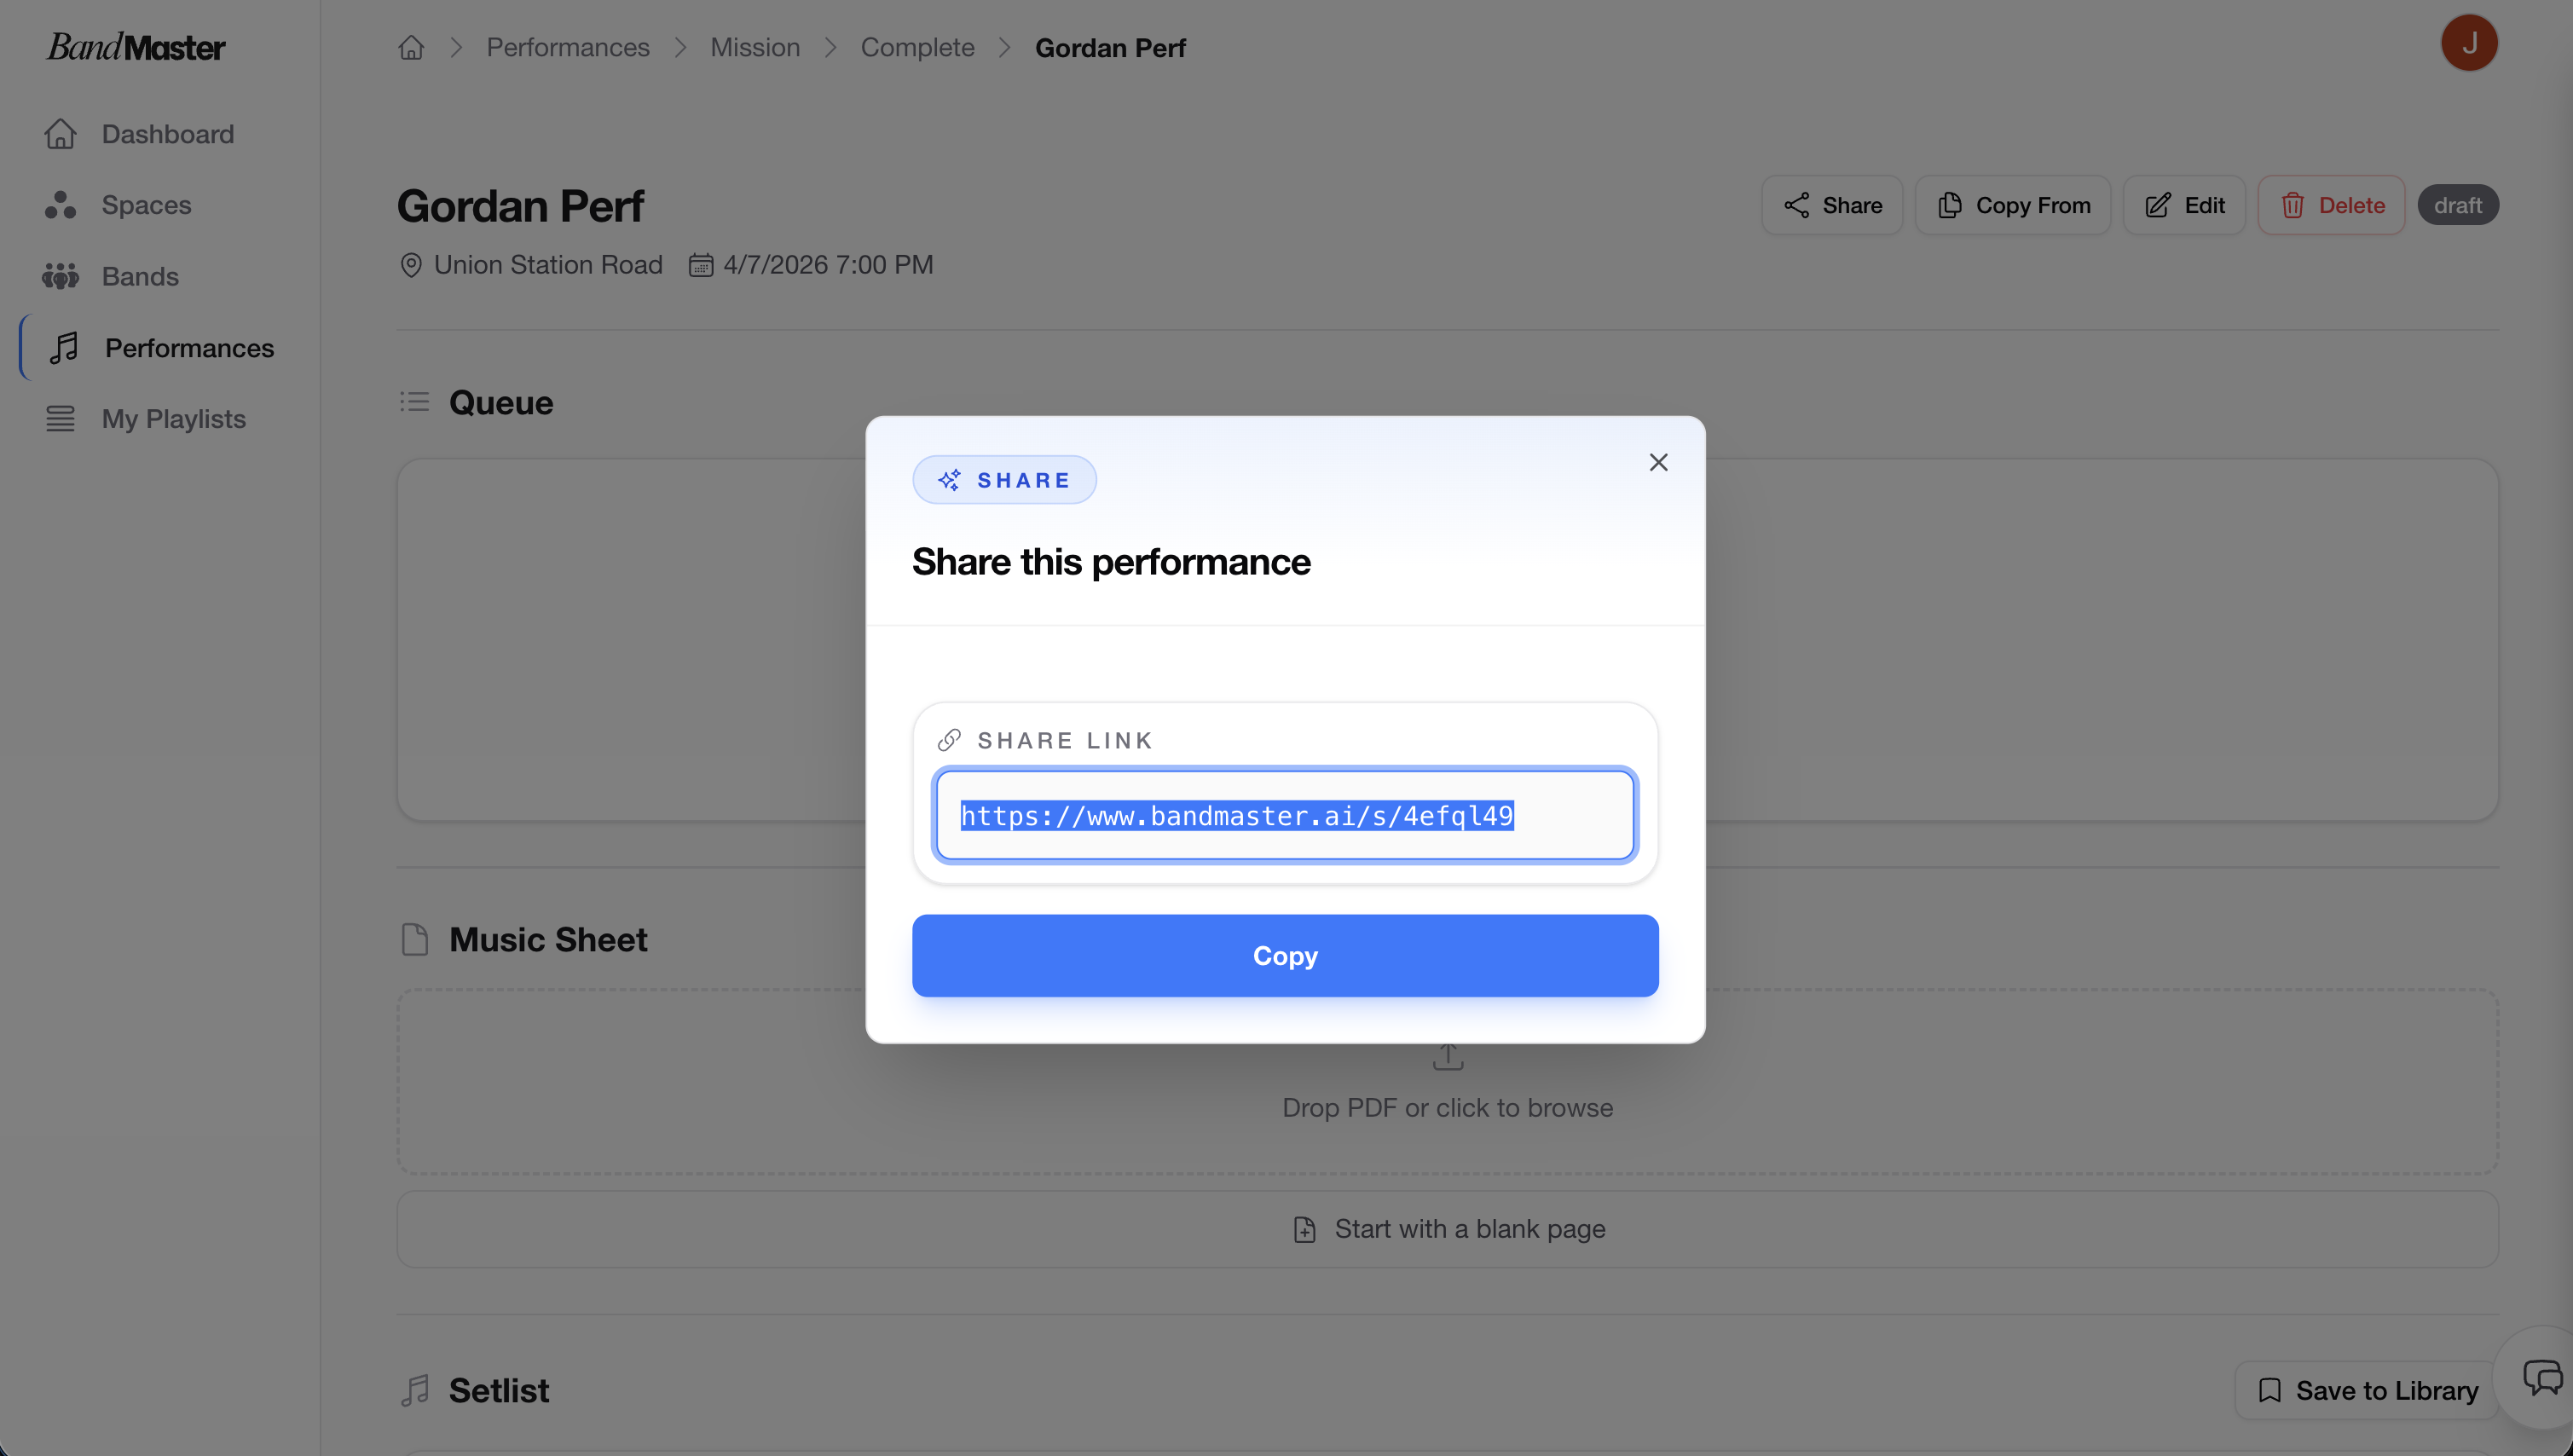
Sharing a Performance
You can share a performance with people who aren't members of your band — for example, a sound engineer or a venue coordinator.
 Share performance dialog
- On the performance page, click the Share button.
- A dialog will show a shareable link.
- Copy the link and send it to whoever needs to view the performance.
The shared link gives read-only access — the recipient can view the setlist, queue, and other sections, but cannot make edits.
Tip: Sharing is perfect for handing the setlist to a sound engineer before soundcheck, or letting a guest musician preview the songs they'll be playing.
Next Steps
- Songs & Setlist — Learn how to add songs, upload audio, and use stems.
- Recurring Events — Automatically generate performances on a regular schedule.
Setting Up the Lineup
The Availability section on a performance page includes a Lineup feature that lets you define which instruments are needed, assign members to each slot, and visually arrange everyone on a stage map.
Step 1 — Open the Lineup Setup
- On the performance page, scroll to the Availability section.
- Click the "Configure Lineup" button (pencil/edit icon).
- The Lineup Setup dialog will open.
Step 2 — Add Instruments and Assign Members
In the Lineup Setup dialog:
- You'll see a list of instrument slots. Add the instruments you need (e.g., Vocal, Guitar, Bass, Drums).
- Use the "+ Add" button next to any existing instrument category to add another slot for that instrument.
- Type a custom instrument name at the bottom and press Enter (or click +) to add a new one.
- For each slot, click the avatar circle or "Add member" to assign a band member.
- A member picker will suggest members based on their instrument specialties.
- You can also type a name manually if the person isn't in the system yet.
- Set each member's status:
Yes(confirmed) /Maybe/No. - Mark a slot as a substitute if needed.
Step 3 — Save Scope: This Performance Only vs. This Venue
When the performance has a venue set, a save scope toggle appears at the bottom of the dialog:
| Option | What it does |
|---|---|
| This performance | Saves the lineup only for this specific event. Other performances at the same venue are not affected. |
| 📍 [Venue name] | Saves the lineup as the default template for that venue. Future performances at the same venue will automatically load this lineup as a starting point. |
Tip: Use "This performance" for one-off events with a unique lineup. Use the venue option when you play at the same place regularly with the same setup — it saves you from configuring the lineup from scratch every time.
Note: The venue save scope only appears when the performance has a venue selected. If no venue is set, the lineup is always saved to this performance only.